Please note:
The solution is based on the American version of the game, so there may be differences from the Spanish one.
As Charlie
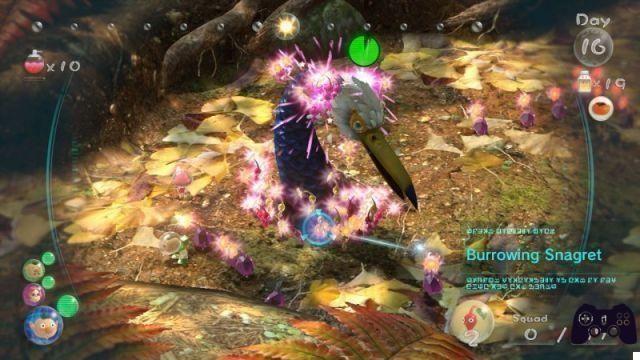
Bounced out of his spaceship and alone in a snowy field, Charlie just has to walk towards those big mushrooms you see on the left. There you come across a group of Pikmin: practice your whistle by gathering them and guiding them around. Add the small group of Pikmin you noticed at the beginning of the level to your troop and head towards the mushrooms. Throw the Pikmin at the mushrooms to clear the way, then at the enemies inside the cave before darkness sets in.
The fate of Alph
Upon awakening, have Alph follow the Pikmin to the onion. After reading the explanations on the screen, launch the Pikmin towards the shards, so that they assemble the bridge with which you can finally reach the KopPad. Now dedicate yourself to collecting flowers to make the onion generate more Pikmin with which to push the cardboard box (you will need at least 20 units), behind which there is a Data Card. Lastly, enter the cave and have the Pikmin shoot down. the sand castle.
The Garden of Hope
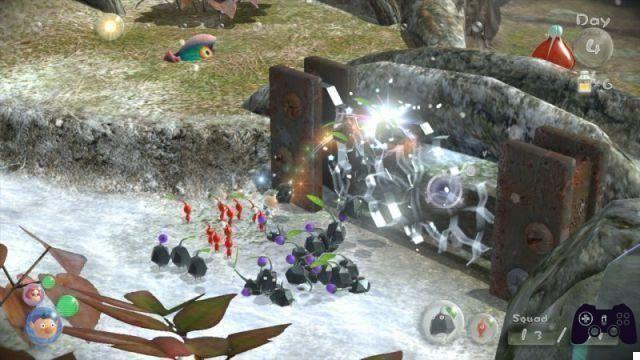
The landing in this area marks the beginning of the second day: from this moment on you will also have to think about recovering fruits to guarantee your survival. First, however, gather your red Pikmin and collect some flowers to expand the ranks of your troop. Then have the Pikmin collect the shards to start building the bridge, while others tear down the wall of sand behind which the missing shards are hidden. After you've put the bridge together and recovered the Data Card, attack the Bulborb focusing on its eyes to maximize the damage. You will soon realize that for now you will not be able to break down the electrified barriers, so divert your attention to the wall of sand and advance until you see Brittany. Unfortunately for now you will have to leave it to its fate, the glass walls are a momentarily insurmountable obstacle. Throw some Pikmin towards the strawberry then, then divert the rest of the troop into the cave where by attacking the flying enemy you can free some rock Pikmin with which to break the crystals and get another onion.
On the way back, the Rock Pikmin can break through the glass wall and free Brittany. Now, after familiarizing yourself with the switch between the two characters, immediately put into practice what you have learned: throw Brittany over the raised edge along with some Pikmin, then as the girl hurl the Pikmin towards the lemon. Before the sun goes down, if you have time left, complete the path that is interrupted by the incomplete bridge that allows you to return faster to the camp. There is also another fruit nearby, but you will probably have to think about it at another time.
The first boss
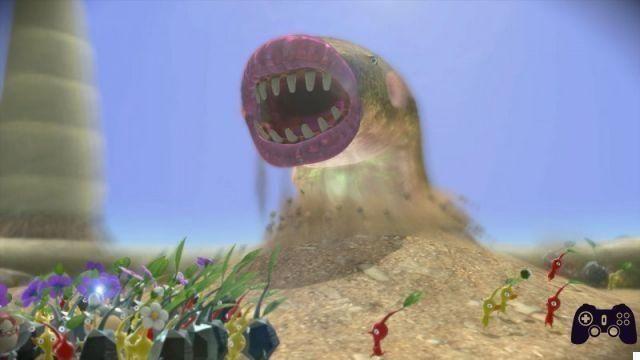
Start the new day by breaking the glass barrier near the ship and continuing in that direction. Beyond, find some enemies that spew flames. Attack them from behind and if your Pikmin get scorched, remember to herd them using the whistle to avoid the worst. The path stops in front of a stream: throw Brittany along with a good number of Pikmin to the other bank so that they can quickly collect the two groups of shards and set up the bridge. After breaking down a wall of sand, you will eventually enter the battle area. The key to winning the battle against this large shelled beast is to keep your group of Pikmin solid and united in any situation. To take down the enemy focus on the area of his head, initially letting the rock Pikmin break his armor and then deploy the red Pikmin in the now uncovered soft-body attack until the final victory. Depending on the time that will remain available to you, you can decide to immediately recover its carcass and the objects that the monster regurgitates, or complete the cleaning of the area at a later time.
l garden of hope - second part
First, clear out the area of the boss's remains and items, safely transporting the phone. Then break down the wall of sand near the blue bridge and approach the makeshift pulley with cans. Throw Brittany and a group of Pikmin on the can on the left, then a larger group on the right: do the opposite to get the first group to reach the lemon and finally return to your ship.
The frozen tundra
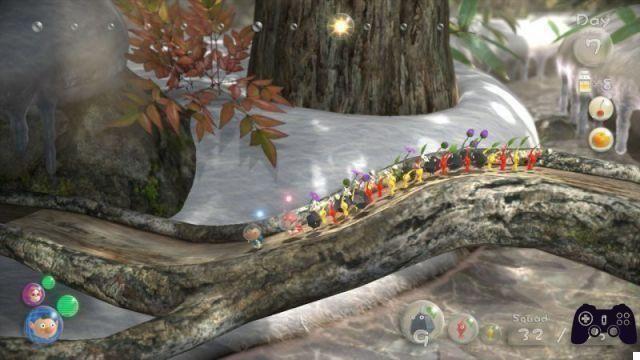
In the initial phase of this day that takes place inside the cave, you will be able to get used to the use of the yellow Pikmin in complete tranquility without the burden of the timer. Use them to connect the circuits and illuminate the area, thereby awakening the flowers and onion. Take advantage of the unlimited time to collect every flower nearby, thanks also to the greater distance at which it is possible to launch this type of Pikmin, and thus collect a group of 25 yellow Pikmin. Once this is done you can launch yourself down along the ice sheet, but be careful: on the outside you will again be subjected to the inexorable passage of time.
After dealing with the flying enemies on the right, you will have to separate your group: 12 yellow Pikmin will go with Alph over the creek, the others will be busy breaking down the electrified barrier. As this happens, get into Alph's control and throw a handful of red and rock Pikmin at Brittany to break down the barrier blocking access to the tiles inside the jar. As soon as possible, organize a small group to climb the path beyond the knocked down electrical barrier and collect more bricks. Kill the Bullborb if it bothers you, but ignore its corpse unless you have a lot of time to waste.
Then go back to the onion with the whole big group. There you instruct the yellows to take care of the electrical barrier nearby, while the others dig the tunnel blocked by snow and break the barrier on the opposite side of the tunnel. Then use the red Pikmin to fight the enemies on fire, while the others take care of the fruit and bricks. The bridge should now be complete. Then take advantage of the passage opened by the yellows by breaking down the barrier and return to the onion, possibly collecting the corpses in the surroundings if there was time.
The hard work of the previous day will help you enjoy more peace of mind while exploring the remaining part of the tundra on the following day. First collect the cherry from the tunnel near the base, then cross the bridge and enter the cave. There by destroying the crystals you can reveal and collect another fruit. Then continue to the northeast and, after taking down some enemies, use the launch of the yellow Pikmin to collect a yellow fruit dangling from a tree.
Then throw a group of about twenty Pikmin on the plateau. There by pushing a metal ball they can reveal access to a cave. Inside, let the red Pikmin deal with the burning enemies, while the yellow ones turn the electricity back on. The light will cause large flowers to bloom which can be used as platforms to get to the fruit at the top.
Boss fight nella tundra
In all likelihood, the actions suggested in the previous chapter were completed close to sunset. At the start of a new day, therefore, gather a group of Pikmin divided equally among those at your disposal and return to the cave discovered at the end of the previous day, using the Pikmin rock to open a new passage. Going left at the crossroads you find yourself inside another cave. Avoid the predators by moving around the lighted areas and use the nectar you get from the enemies to make the Pikmin develop. By activating the last link you will see a large winged being departing. Take advantage of the quiet and send a team of Pikmin up the sprig to reach the grapes. Continue to illuminate the environment through the work of the yellow Pikmin, while the red and rock ones keep Phosbat's puppies at bay: this is the name of the Socrto being previously. This will present itself briefly on the ground: throw your Pikmin at it, then take refuge under a light when the beast shakes to resume its flight. Resume construction and launch Brittany along with a delegation of yellow Pikmin up the slope to power another circuit. The next step is the construction of the bridge, possible thanks to the tiles that are located on a hill that can be reached by stretching a stick on which the Pikmin will climb in single file. You decide if this will be the last action of the day or the first of the next. The tiles needed to complete the work are inside a crystal block on the opposite side.
Anyway, after crossing the bridge you can finally power the big battery and light up the whole area, thus starting the boss fight. The beast will try to suck in your trusted helpers, so try to keep your party out of its jaws. You will have three attack windows. While flying, hurl the yellow Pikmin at him, when he settles on the edge of the cave or lands on the ground, target him with the rock and red Pikmin instead. At the end of the battle, Captain Charlie will be reunited with his two assistants. Back to base camp, use a dozen Pikmin to move the paper bag, while the others carry the remains of the Phosbat and the corpses of the enemies killed along the way.
Cleaning in the Tundra
Before moving on to another setting, it's a good idea to collect the last few items left in the frozen tundra. Head north, near where you emerged from the cave. Do you see that sort of mushroom? It is actually a trampoline: throw one of the three characters and some Pikmin on it to retrieve the whistle placed on the hill, with which you can order your group a quick dodge. Then all that remains is to retrieve other grains, placed a short distance from the whistle, and the other fruit on the stump of a tree, to reach which, however, you will have to clear the road from some enemies. If you have Pikmin left over, assign them the task of collecting the red berries from which you do not get nourishment, but an energizing liquid rather useful in the most excited phases.
A leap to the tropics
Now that you have nothing else to do in the tundra, dedicate yourself to exploring the other area on the map, characterized by a much milder climate. Immediately break down the wall of sand that stands near the landing area and eliminate the Bullbord that was hiding behind it. Nearby, don't miss a semi-buried fruit. Also note some small mounds of earth inside which there are stones-bombs: handle them carefully to avoid accidental victims and use them to break down the barrier made up of stones. Continue past the newly opened gate and hurl two captains along with some Pikmin over the broken bridge.
Assign some Pikmin to collect the tiles, while others tear down the wall of sand. Then gather the troops and continue on the path to the left of the newly knocked down wall to collect the Metal Suit Z Armor.
Protect the Pikmin carrying the armor by keeping them safe from the various beasts along the way, and keep your eyes peeled for a dangling fruit. When the bridge is finished, rejoin the three captains and move with the whole group through the bottleneck towards the paper bag: pushing it you will create a shortcut to the field, facilitating future operations. On the right you can take the path to the boss of the area. The fight will be long, so close operations for today and bring the troops back to base.
The desert worm
Follow the path indicated at the end of the previous paragraph and get ready to face a large worm moving under the sand. Keep moving and immediately move away from the position from which you see it emerge to prevent your Pikmin from being sucked into an underground vortex. Then use the new whistle to dodge the sandballs it throws at you: if your Pikmin are hit you will have to free them with the whistle. There are two ways to take down the worm. You can use an army of red Pikmin, perhaps enhanced by the energizing nectar, and hurl them at the enemy as they rise out of the sand. Alternatively, you can throw rock bombs into the worm's jaws while it creates a vortex by sucking up the sand. Finally, collect the parts of his huge body, the watermelon pieces and the cell phone before returning to the camp.
Cleaning in the tropics
After breaking down the barrier to the north, continue along the newly discovered path, taking with you some rock-bombs collected on the road. Go under the waterfall and collect some nectar as you advance to another barrier. Using the bomb stones, you therefore gain access to a larger area: there you will have some Pikmin in charge of collecting the tiles while others will dig the mound of earth to find the missing ones. Finally, collect the fruit over the bridge then gather the troops and return to the base.
The Twilight River
Move your group towards the river and jump onto the first floating leaf passing by, getting off at the first stop. You are faced with a crystal which, once broken, reveals a first pile of tiles useful for building the bridge. While the Pikmin bring them into position, use other yellow Pikmin to destroy the electrical barrier, beyond which you'll have to deal with a rather aggressive beast first. A little further on is a second pile of tiles. Meanwhile, throw a captain and some rock Pimmin on the edge past the waterhole to find a fruit inside a crystal. Then go back following the river until you meet a strange fish floating in the air and swelling. Nearby is a cave: enter and charge the yellow Pikmin with the power of the lamp. The light will make flowers bloom that can be used as a walkway leading to the last block of tiles.
Now that the bridge is complete, cross it with a group of about fifty Pikmin, among which the Rock Pikmin must abound. You will find yourself in front of an onion imprisoned in a spider web: kill the spider and free the onion, revealing the presence of a winged Pikmin. Quickly use the spider carcass to spawn more, while the single winged Pikmin pulls out the tufts that protrude from the ground. When you have enough Pikmin, lift the stick that blocks the flow of the current to open a new passage for the leaves moving on the water. A short distance away, near the stones that line the river, there is a fruit. Cross the river after having collected it and arrive in the area of the tomato box: there you will extract a fruit and some explosive stones from the ground that you will use to destroy the barrier that separates you from the collection point. Then navigate on the floating leaf and get off near the spider, then push the paper bag to create another access route to your shuttle.
Once the passage is open, return to the spider you saw a little while ago (or the previous day) and eliminate it, then cross the river on the left, circumnavigate the bridge on the right, which is now incomplete and finally come near some bamboo canes. Behind them voracious beings are sleeping, so move carefully. Power the electrical connection using the yellow Pikmin, then pick up the fruit and sneak away. Then go back to the place with some explosive stones and use them to immediately eliminate at least two of the enemy creatures, then roll out the third one and bring their corpses back to the onion while the yellow Pikmin take care of the electrified barrier nearby. At this point it will be the case, in all likelihood, to return to the camp to avoid the darkness.
Upon awakening, go up the cardboard box near the landing point, cross the river, climb on the leaf and get off at the first stop on the opposite bank. Take on the flying enemies with the winged Pikmin, then instruct them to fly over the pool of water and retrieve the tiles.
In the meantime, knock down the wall of sand and retrieve the folders behind it: be careful, under the first there are enemies, while the second hides other tiles. Before proceeding with the recovery, however, kill the spider nearby to prevent it from intercepting your Pikmin. Then using a couple of captains, lead a group of Pikmin, rock and winged, up to the brick using the mushroom. The rock Pikmin will be used to destroy the crystal that hides a fruit and kill the spider, while the winged ones to get to other bricks placed on a trunk. Finally return to the base and wait for a new dawn.
Mini boss and river boss
Back on the adventure, head to the red-brick bridge, cross the electrified barrier and turn left. There you come across a mini boss: a sort of chanterelle whose long neck protrudes from the ground. Concentrate with the rock Pikmin on your neck and you'll get rid of them easily. Then move the paper bag to create a new path to the field.
After setting up a group of one hundred Pikmin, favoring the winged ones (at least 40) and the rock ones, go back to the red bridge and proceed to the boss fight area. Your opponent is a kind of hornet protected by a swarm of other flying beings. Avoid his attacks and wait for the moment when his helpers are not in formation in front of him, then attack him with yellow winged Pikmin that will drag him to the ground, where the rock ones can rage and knock him down. You will have to repeat this sequence three or four times, alternating it with precipitous escapes from the attacks of the small flying beings.
Cleaning at the river
As always happens after a boss fight, the next day is dedicated to collecting the remaining items, in particular the fruits and the body of the eliminated boss left intact in the battle area.
Return to the garden of hope
The day starts with bad news: your supplies have been stolen! You absolutely have to collect new fruit. Set up a group of 60 Pikmin (yes, a new type is about to join your troop) equally divided among the different types available and continue along the path indicated by Brittany to the half-buried onion. Extract it using the winged Pikmin to reveal a blue Pikmin capable of swimming. Collect the flowers to thicken their ranks, then instruct this last type of Pikmin to recover the tiles underwater while the others think about those on the ground. With the blue Pikmin walk the path under the river and wait for the others to move the can to get to the fruit, while the ones on the ground cross the river and deal with the attacking creatures using bubbles. At this point the ground contingent can move the tin, clearing the way for the blue companions, and destroy the crystal that contains another fruit. To clear the passage, however, winged Pikmin will have to raise the bamboo gate.
At the dawn of a new day, organize a group of blue Pikmin, accompanied by some winged specimens, and cross the river to the left of the red bridge. Following the wall you should find a slope on the left that leads to a trim: inside this there is a fruit that can be collected by winged Pikmin. Then bring the Pikmin not engaged in the water transport and pass them inside a tunnel. At the exit you will find some blue tiles, and a miniboss, an ugly version of a lobster. Try to attack its eyes without ever stopping in front of the beast to avoid its charges: when the animal rolls on its back, attack its bare belly. While returning to the base with the corpse destroy the wall of sand to shorten the trip. As you may have noticed, the tiles are used to build a sort of vase from which you can reach the central island, but to complete the work you will need other pieces.
The right opportunity comes the following day. Break down the sand wall near the partially built tower and retrieve the tiles lying in the corner. The Overturned Pot now allows you to transport the troop to the central island - make sure you have a good number of Rock Pikmin with you. There, after eliminating a crab, you can collect a secret note and some tiles, actually hidden inside crystals, with which to build a bridge. The missing tiles at the completion of the passage are on the other side of the bridge, beyond a narrow passage. When the bridge is finished get ready for another boss fight.
Quaggled Mireclops
This paragraph is named after the big boss that you will face in one of the funniest battles in the game. Start by setting up a group of red and blue Pikmin, along with a dozen rocks. Destroy the crystal in the center of the island to discover that the entire island is the boss, a living being with legs. Keep to the edges of the island, throwing the blue Pikmin on each foot. Obviously the monster will shake its paws spreading around your Pikmin that you will have to be quick to group. When the beast collapses, go back to the crystal and throw other rock Pikmin at it.

Stay in the center, escaping his tongue, until you destroy the crystal and reveal the acorn, which must obviously become the target of your attacks, made more intense by the energizing nectar with which it is advisable to dop the Pikmin. Whenever the beast drops you, wait for the right moment to climb back onto the acorn stem to rage with your attacks. Repeat this sequence three or four times until you take down your opponent.
The Oak
This final area is quite labyrinthine, so resign yourself to the idea that it will take some time to orient you. First, set up a well-blended group of Pikmin to free Olimar, letting one division attack the blob while others - possibly blue and winged - retrieve Olimar's weakened body. Move quickly, chased by the blob, inside the cave. Pass the concrete block on the right and proceed past the large sunny room to the tunnel on the opposite side. At the fork, go left, deal with the Bullborbs as quickly as possible, then get ready to destroy as soon as possible the two barriers that await you beyond, one of sand and one of glass on the left. In the next room, which is teeming with enemies, hug the wall on the right to the first tunnel, avoiding all unnecessary confrontations. This passage takes you back to the Bullborb room: continue, collecting three bomb stones and repeat the path, but this time deviate towards the tunnel that leads to the concrete barrier seen at the beginning. Take it down with the three bombs and proceed to a crystal: after destroying it, enter another large sunny area. Ignore the barriers and take the tunnel to the left. You find yourself in a dark cave: follow the dimly lit path and take the lower path, keep to the right of the pool of water, and collect the tiles, then break down a wall of sand to continue along the path that now slopes. Collect more bricks before going through the narrow root passage by the water's side to get to a circuit that the yellow Pikmin can activate. Thanks to the light the flowers near the bridge will bloom.
Then take the narrow passage near the entrance point in the cave (in all probability you will have to leave from this point on a new day) to go up, cross the bridge and use the flowers to get to the platform from which you can throw some yellow Pikmin on the other bank where they can activate the circuit. When the cave is fully illuminated, the blossoming flowers allow access to every area of the upper floor of the cave. Then cross the flower bridge and break down the sand barrier to finally return outside.
The end
The blob monster has now assumed a humanoid form and attacks you, hurling parts of its body at you that slowly rejoin the trunk. Concentrate either on the extremities that it throws at you or on its trunk, until due to the damage suffered, what remains of the being takes flight. Attack him now with the winged Pikmin to bring him back to the ground. At that point the battle will resume according to the initial dynamics. The battle will be long, and you'll probably need to resort to another batch of onion Pikmin. Hold on and follow the guidelines described above to finally conquer the game's ending.
Congratulations, you have finished Pikmin 3!
 Pikmin 3 wiiu
- WiiU
Exit date: July 26 2013